Keeping your home safe and dry starts with a healthy roof. But how do you know if your roof is up to the challenge? Roof leaks can be sneaky, causing hidden damage long before you notice a dripping ceiling.
This guide empowers you to become a roof detective! We’ll walk you through the steps of inspecting your roof for leaks, helping you identify potential problems before they become major headaches (and expenses!).
What Causes Roof Leaks?
While worn shingles and clogged gutters are common culprits, leaks can also arise from less obvious problems:
- Improper Ventilation: Your attic needs proper ventilation to allow moisture to escape. Poor ventilation can trap moisture, leading to condensation that can damage roof components and contribute to leaks.
- Roof Age: Even the best-maintained roofs eventually succumb to Father Time. As your roof ages, the materials naturally deteriorate, becoming more susceptible to leaks.
- Faulty Installation: The highest-quality roof can leak if the workers do not install it correctly. Improper installation of shingles, flashing, or other components can create vulnerabilities that allow water to seep in.
- Animals: Critters like birds, squirrels, and raccoons can damage your roof as they search for shelter or nesting materials. This damage can create openings for leaks.
- Tree Branches: Overhanging tree branches can scrape and damage shingles over time. Moreover, heavy branches rubbing against your roof during storms can cause punctures or tears.
Signs That Might Indicate Roof Leaks
Before we grab our flashlights and head outdoors, let’s explore some telltale signs that might suggest a leak in your roof.
- Visible Stains on Ceilings or Walls: Water damage often announces its presence with brown or yellow stains on your ceilings or interior walls. Stains typically appear directly below the source of the leak. Keep in mind that these stains can take time to develop, so even a small leak might not show its effects immediately.
- Blistering or Peeling Paint: Is the paint on your ceiling or walls starting to bubble or peel? This could be a sign of moisture trapped behind the surface.
- Mold Growth: Mold thrives in damp environments. If you notice mold spores creeping across your walls or ceilings, there is likely a leak in the roof.
- Increased Utility Bills: A leaky roof can affect your home’s insulation properties. If your heating or cooling bills seem inexplicably high, it’s worth checking your roof for leaks.
- Missing or Damaged Shingles: Shingles are your roof’s first line of defense against the elements. Missing or damaged shingles expose the underlayment beneath, creating a prime entry point for leaks.
Remember: Even if you don’t see any of these signs inside your home, it’s still wise to inspect your roof regularly, especially after heavy storms or periods of intense sunshine.
Taking a Closer Look: How to Inspect a Roof for Leaks
Now that you’re armed with the knowledge of potential leak signs, let’s get started with the inspection! Here’s what you’ll need:
- Safety First: A sturdy ladder, work gloves, and sturdy shoes with good traction
- Bright Flashlight: For illuminating dark attic spaces and roof areas
- Binoculars (optional): For a closer look at hard-to-reach areas
Pro Tip: Schedule your inspection for a dry day with good lighting. Avoid climbing onto your roof if it is wet, snowy, or icy – safety always comes first.
Step 1: Attic Inspection
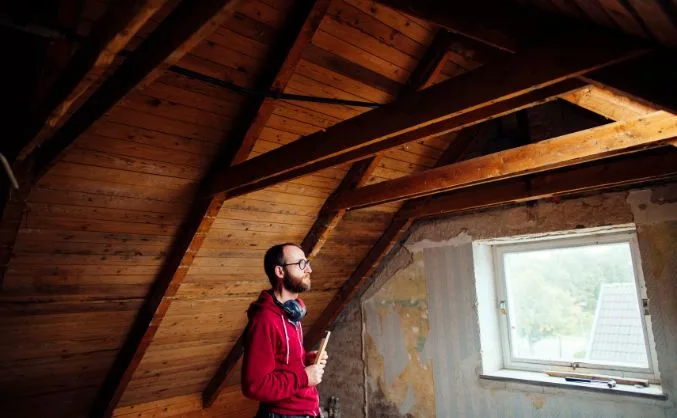
- Look for Signs of Water Damage: Head to your attic and use your flashlight to examine the underside of your roof deck (the wooden boards that form the base of your roof). Look for water stains, mold growth, or warped wood, all potential signs of a leak.
- Check Flashing Around Vents and Chimneys: These areas are common entry points for leaks. Look for gaps, cracks, or rust around vent pipes or chimneys.
Step 2: Exterior Roof Inspection (if safe to do so)
- Shingle Condition: Carefully examine your shingles for any signs of damage, such as curling, cracking, or missing shingles.
- Roof Flashing Inspection: Like in the attic, check the flashing around chimneys, roof vents, skylights, and eaves for any damage or gaps.
- Look for Debris: Clogged gutters and drainage areas can cause water to back up under the shingles, leading to leaks. Make sure your gutters are clear and debris-free.
What to Do If You Find a Leak
If you discover a leak during your inspection, don’t panic! Here are the next steps:
- Contain the Leak (if possible): If the leak is small and you can safely access it, place a bucket or tarp underneath to catch drips.
- Document the Damage: Take pictures of the leak and the surrounding area. This documentation will be helpful when contacting a roofing professional.
- Call a Qualified Roofing Contractor: Don’t attempt to repair a major leak yourself. A qualified roofer can assess the damage, identify the source of the leak, and recommend the best course of action for repair. Roofing professionals have the necessary training and tools; they know how to repair roof leaks properly.
FAQs
How often should I inspect my roof?
Experts recommend that you inspect the roof twice a year — once in the spring after winter and once in the fall before winter. After major storms, it’s also wise to check for any damage.
Can I repair a roof leak myself?
Minor leaks might be manageable for a handy homeowner, but for most, it’s best to leave roof repairs to the professionals. They have the experience and expertise to diagnose the source of the leak and ensure the repairs are done correctly, preventing future problems.
What are some common causes of roof leaks?
- Worn or damaged shingles: Over time, shingles can crack, curl, or become brittle, creating openings for water to seep through.
- Improper flashing: Roofers install flashing to seal around roof valleys, chimneys, vents, and other areas where different sections meet. If workers damage the flashing or install it improperly, water can leak into your roof.
- Clogged gutters: Overflowing or clogged gutters can cause water to back up under the shingles and lead to leaks.
- Ice dams: In colder climates, ice dams can form along the edge of your roof, preventing water from melting snow from draining properly. These dams can cause water to back up under the shingles and leak into your roof.
How much does it cost to repair a roof leak?
The cost of repairing a roof leak can vary depending on the damage, the size of the leak, and the materials needed. Minor leaks might only cost a few hundred dollars, while major repairs can run into the thousands.
When should I call a roofer?
The sooner you address a roof leak, the better. A small leak can become a major problem quickly. Indeed, even small leaks can cause extensive damage to your roof and the interior of your home. If you suspect a leak, don’t delay — call a qualified roofer for an inspection and estimate.
Don’t Let Leaks Leave You High and Dry
Inspecting your roof for leaks is a crucial part of preventative home maintenance. By following the tips in this guide, you can identify potential problems early. Then, you can take appropriate steps before the leak causes serious damage.
Don’t Delay — Get a Free Inspection and Keep Your Home Leak-Free with Union Roofing
Remember, if you discover a leak or suspect a problem, don’t hesitate to call in the professionals. Union Roofing has a team of experienced, certified roofers who can quickly and accurately diagnose the source of the leak. They can recommend the best course of action and ensure your roof is watertight and secure. Union Roofing also provides emergency services 24/7, even on holidays.
Contact Union Roofing today for a free inspection and consultation. We’re here to help you keep your home safe and dry!


